There are a lot of different lighting scenarios you can use in your newborn photography. Most of the time when you like a photographer’s “style” it has a lot to do with their lighting setup.
Most of these lighting styles can also be done with natural window light. The difference is instead of moving the light you change the angle/position of the baby.
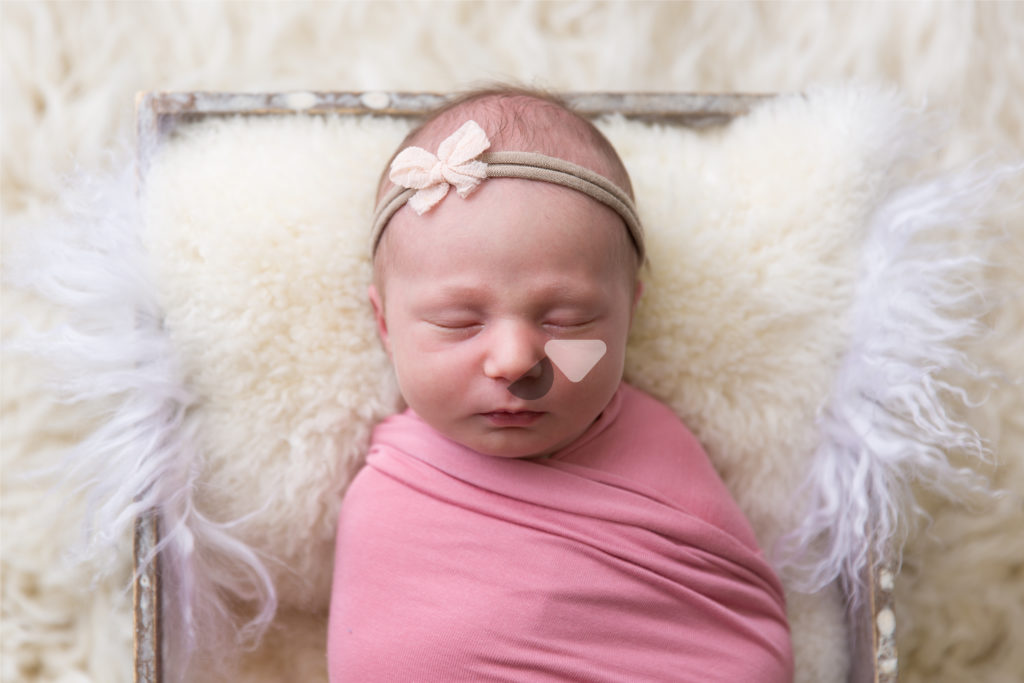
*A key to remember when studying lighting is that in other types of photography your subject is usually sitting or standing up-right. What makes newborn photography different, is your subject may be laying on their back or on their side. So, when talking about light position it’s always important to see the relationship between the light and the subjects face. An easy way to see this is how the shadows falls from the baby’s nose.
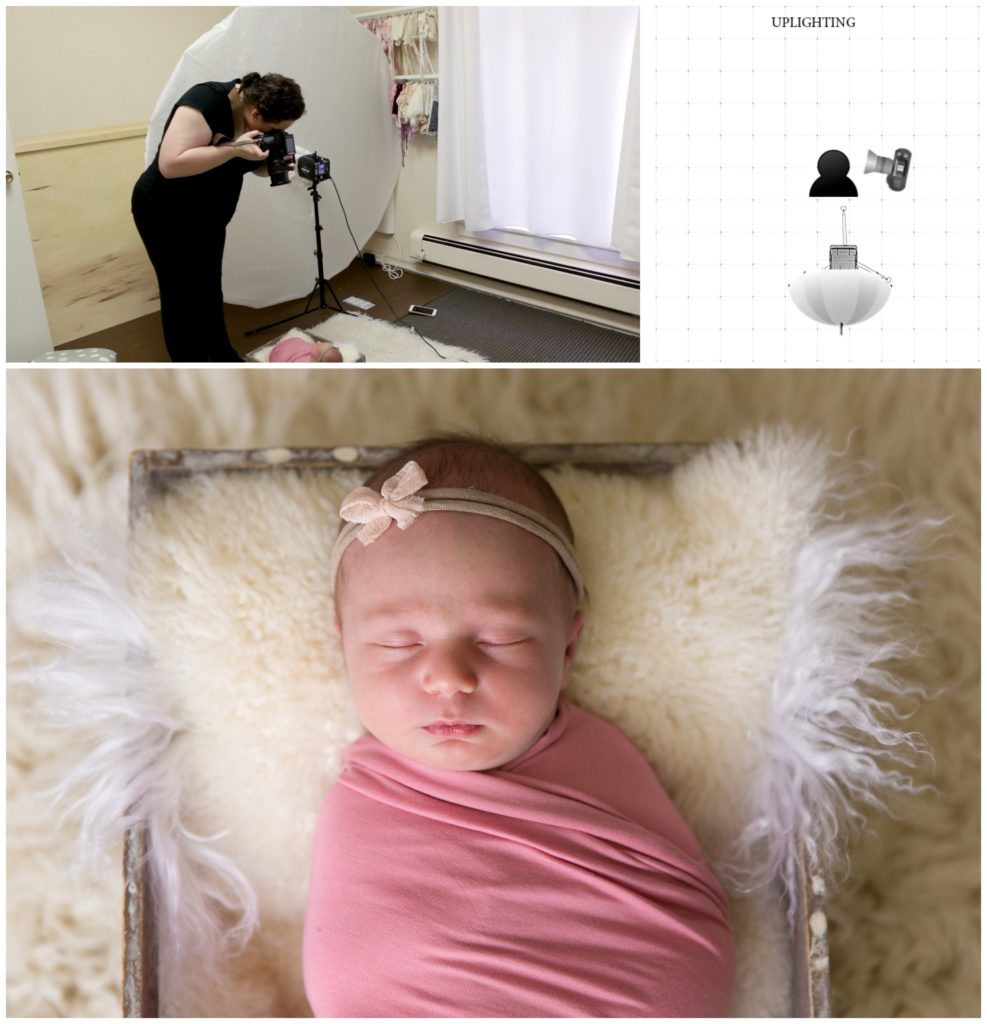
Uplighting
One lighting scenario that is pretty universally frowned upon is uplighting. This means the light source is going from the bottom of the face up. It’s also called ghoul lighting-think of using a flashlight to tell a scary story around a camp fire.
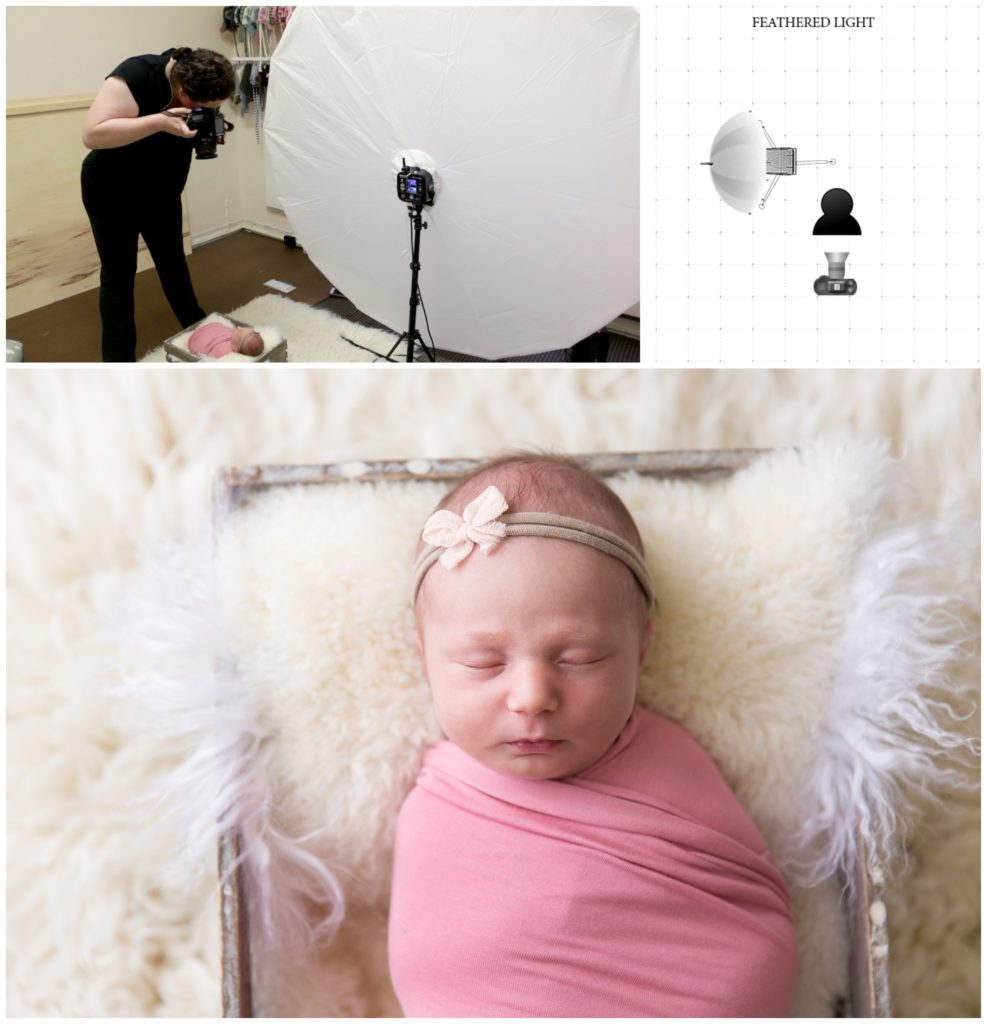
Feathered Lighting
Feathered lighting produces deep but soft edged shadows. Feathering is when the light is in-front the baby’s head and the light is skimming across it. The lighting modifier (umbrella, plm, or softbox) is at a 90 degree angle to the face.
There are 2 popular ways to do this. First, you can have the edge of your light source in-line with the top of the babies head. This will give you the most shadows.
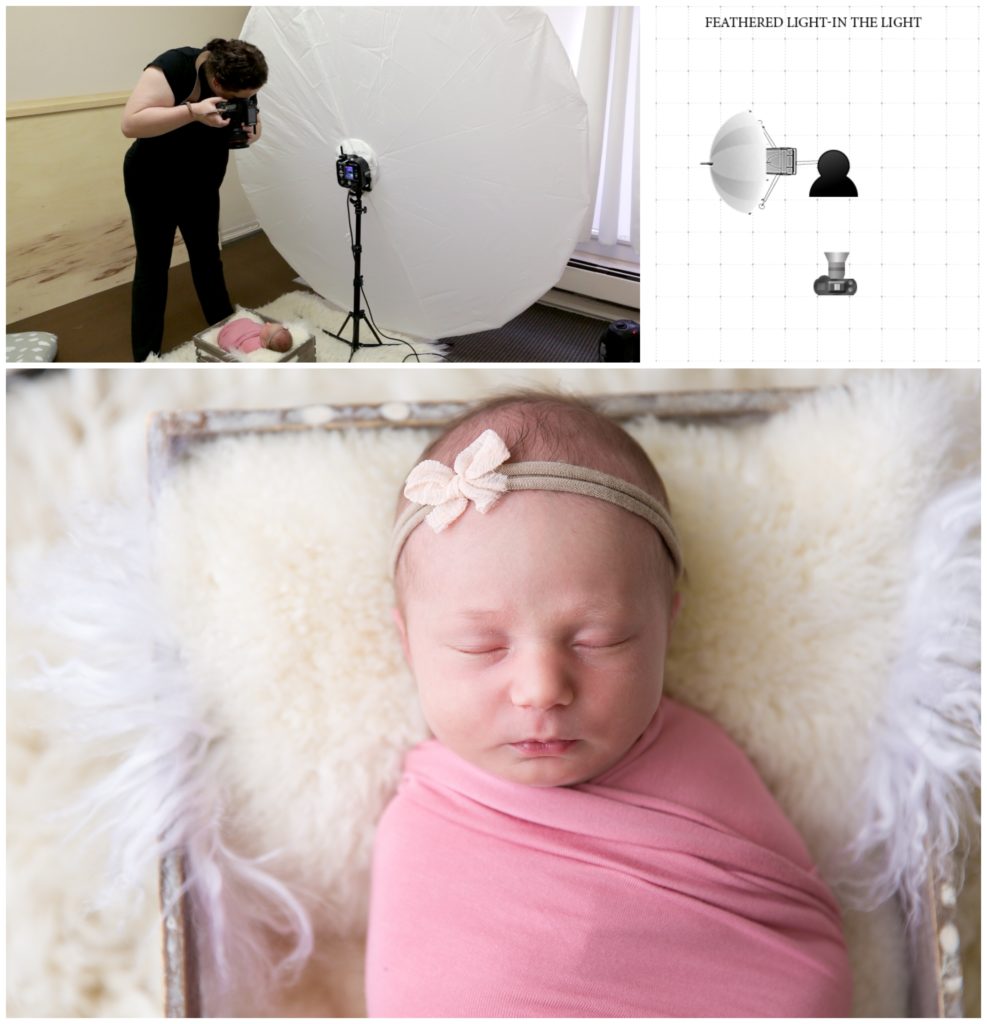
Second, is a popular modification of this where the baby is “in the light”. Meaning baby is in-line with the middle of the light. This will still give you shadows but they will be softer cause of the light proximity and size. You will also get more fill.
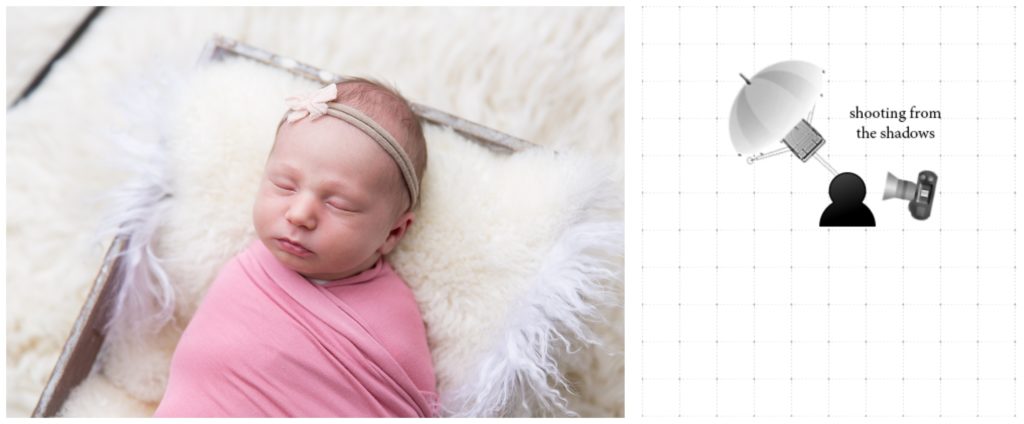
This is my favorite lighting setup to use when shooting from the shadows-meaning I’m positioned on the shadow side of the face. It really beautifully defines their little profiles.
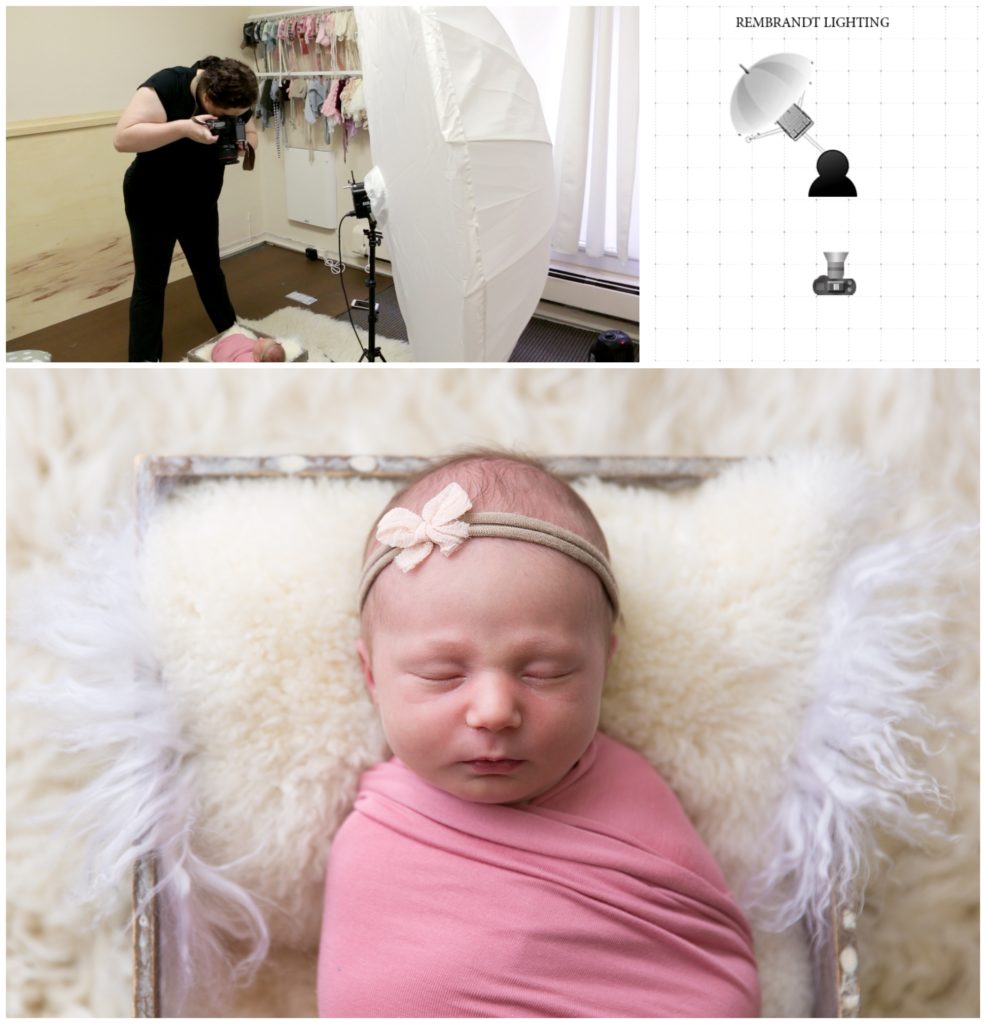
Rembrandt Lighting
This is my favorite lighting setup and what I use about 90% of the time. This is when the light falls at a 45 degree angle across the face. The name for the lighting comes from Rembrandt and renaissance paintings where they would use natural window light. The keys to look for are, a shadow coming from the nose off to the side, and an upside-down triangle of light on the shadow side of the face. There are also 2 ways to do this. One is to have the light at a 45 degree to the subject, but the modifier still at 90 degrees to the ground ( straight up and down). This will give you Rembrandt lighting with deeper shadows.
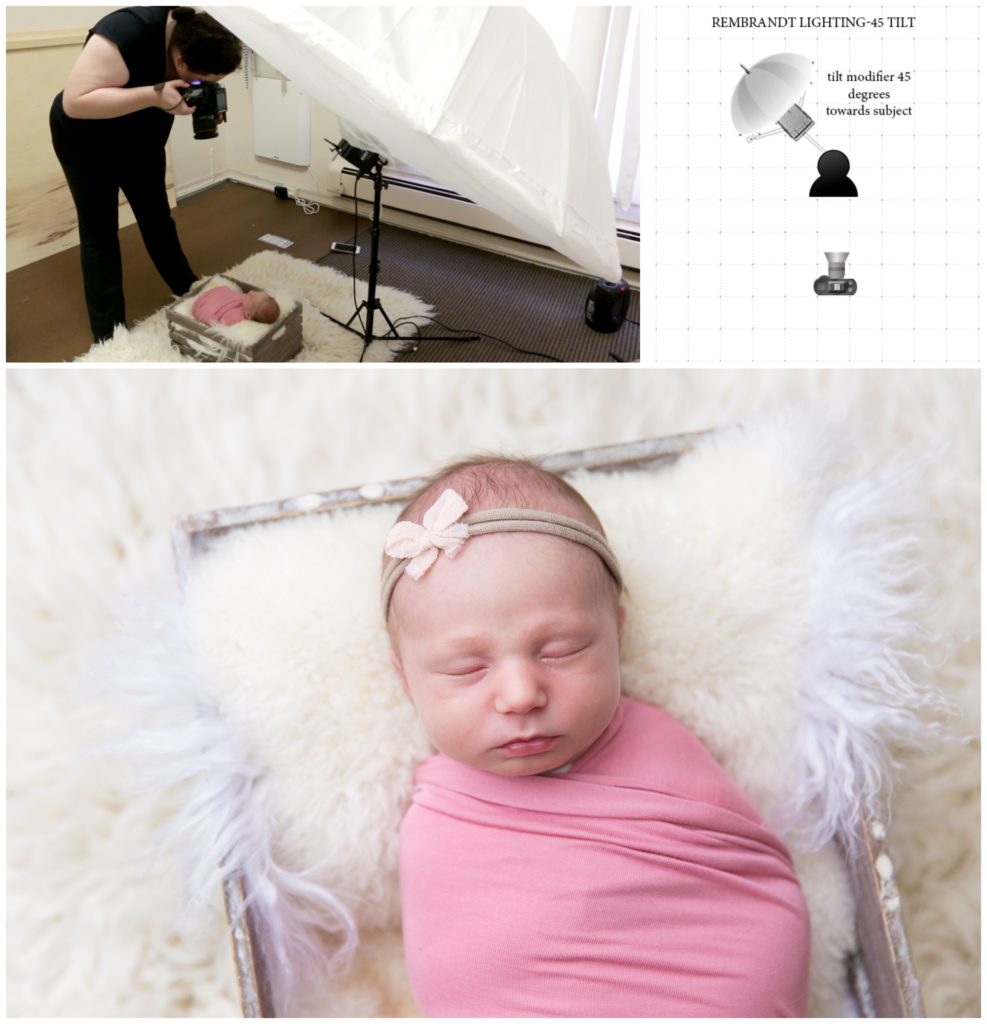
My favorite way to do it, is the have the light at a 45 degree to the subject, but also tilt the modifier about 45 degrees. The more you tilt the modifier towards your subject the more wrap around fill you’ll get in the shadows.
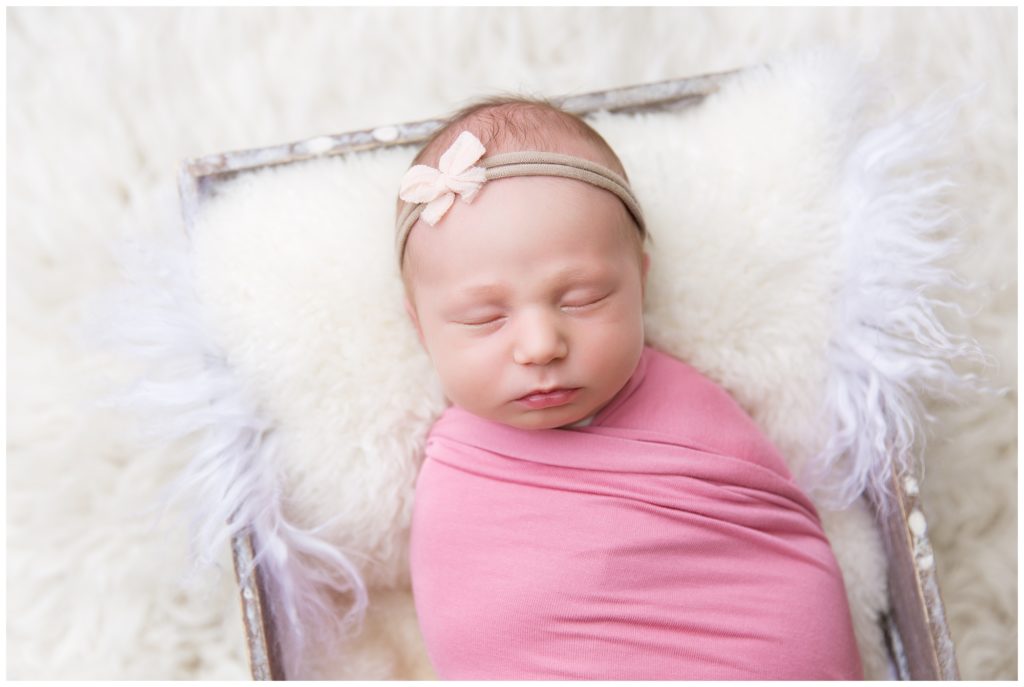
And here is a fully edited example of the Rembrandt Lighting with the tilt.
So glad you liked it! I switched because the reversible stand isn’t very sturdy, and with a 86′ PLM it just felt very wobbly. I never had it fall over and I know a ton of photographers us them, but I wanted something with more bulk and felt more secure. Plus eventually I want to use a boom arm too.


Hi! Thank you so much. This was so helpful! Can I ask if you keep the room dark or you leave other lights on beside the Einstein?
Thank you so much! I’m so glad it was helpful! I have overhead fluorescent lights on and I color balance for them in camera
Do you use Kelvin for white balance?
Yes I shoot Kelvin, usually around 5200, and I also add some purple in camera to balance the fluorescent light.
Thank you. This was a huge help!
Awesome content. Great insight. Thank you for this. Mind telling us why you decided to go from a reversible light stand to the C stand?
So glad you liked it! I switched because the reversible stand isn’t very sturdy, and with a 86′ PLM it just felt very wobbly. I never had it fall over and I know a ton of photographers us them, but I wanted something with more bulk and felt more secure. Plus eventually I want to use a boom arm too.
The end result is stunning. Thank you!